Sunday, July 20, 2014

Bi-weekly Work Cookouts

Lots of things have been, or are going to be, changing at work lately and in the next few months or so.  To help build and keep morale up in the Accounting department, we've been doing group activities and such.  The most common has been going to play Laser Tag and then for dinner. We've gone quite a few times and we love it!  One of the other things we're doing this summer are bi-weekly cookouts.  We split the Accounting department into two teams (6 people each) and every other week one of the teams puts on a cookout for lunch for everyone.  We all pitched in some $$ to start, and whatever we spend gets reimbursed out of those funds.  So far there have been two of these cookouts.

The first was put on by Team A (not my team) and we had hot dogs, burgers, grillers (some kind of burgers with lots of stuff in them), coleslaw, macaroni salad and potato salad.  I only have one picture from the first cookout because sometimes I'm a bad picture taker, haha.

The second cookout was my team's turn to do a cookout.  We did ribs, chicken wings, beans, potato salad, pasta salad, cornbread (in my Dutch Oven!!), scallops and I can't remember what else!
Work has a grill that we have access to use
 
I love ribs and looking at these again is making me hungry!!!

Here's the spread of all the food we had! 

This is the cornbread cooking.  I forgot to take a picture of it when it was done.

We also decided to do dessert with our cookout and what better dessert than S'Mores!!!  We used charcoal briquettes to roast the marshmallows and they worked awesome!
S'Mores ingredients pre-cooked, haha

One of my co-workers roasting her marshmallow!

I believe there is one more cookout for each team to put on.  The next one is Team A's turn, so stay tuned to see what they make!


~Chelle *o*


Saturday, July 19, 2014

Dutch Oven Cooking

As I said in my previous post, I went camping last weekend and used my dutch oven to make some yummy food!!!


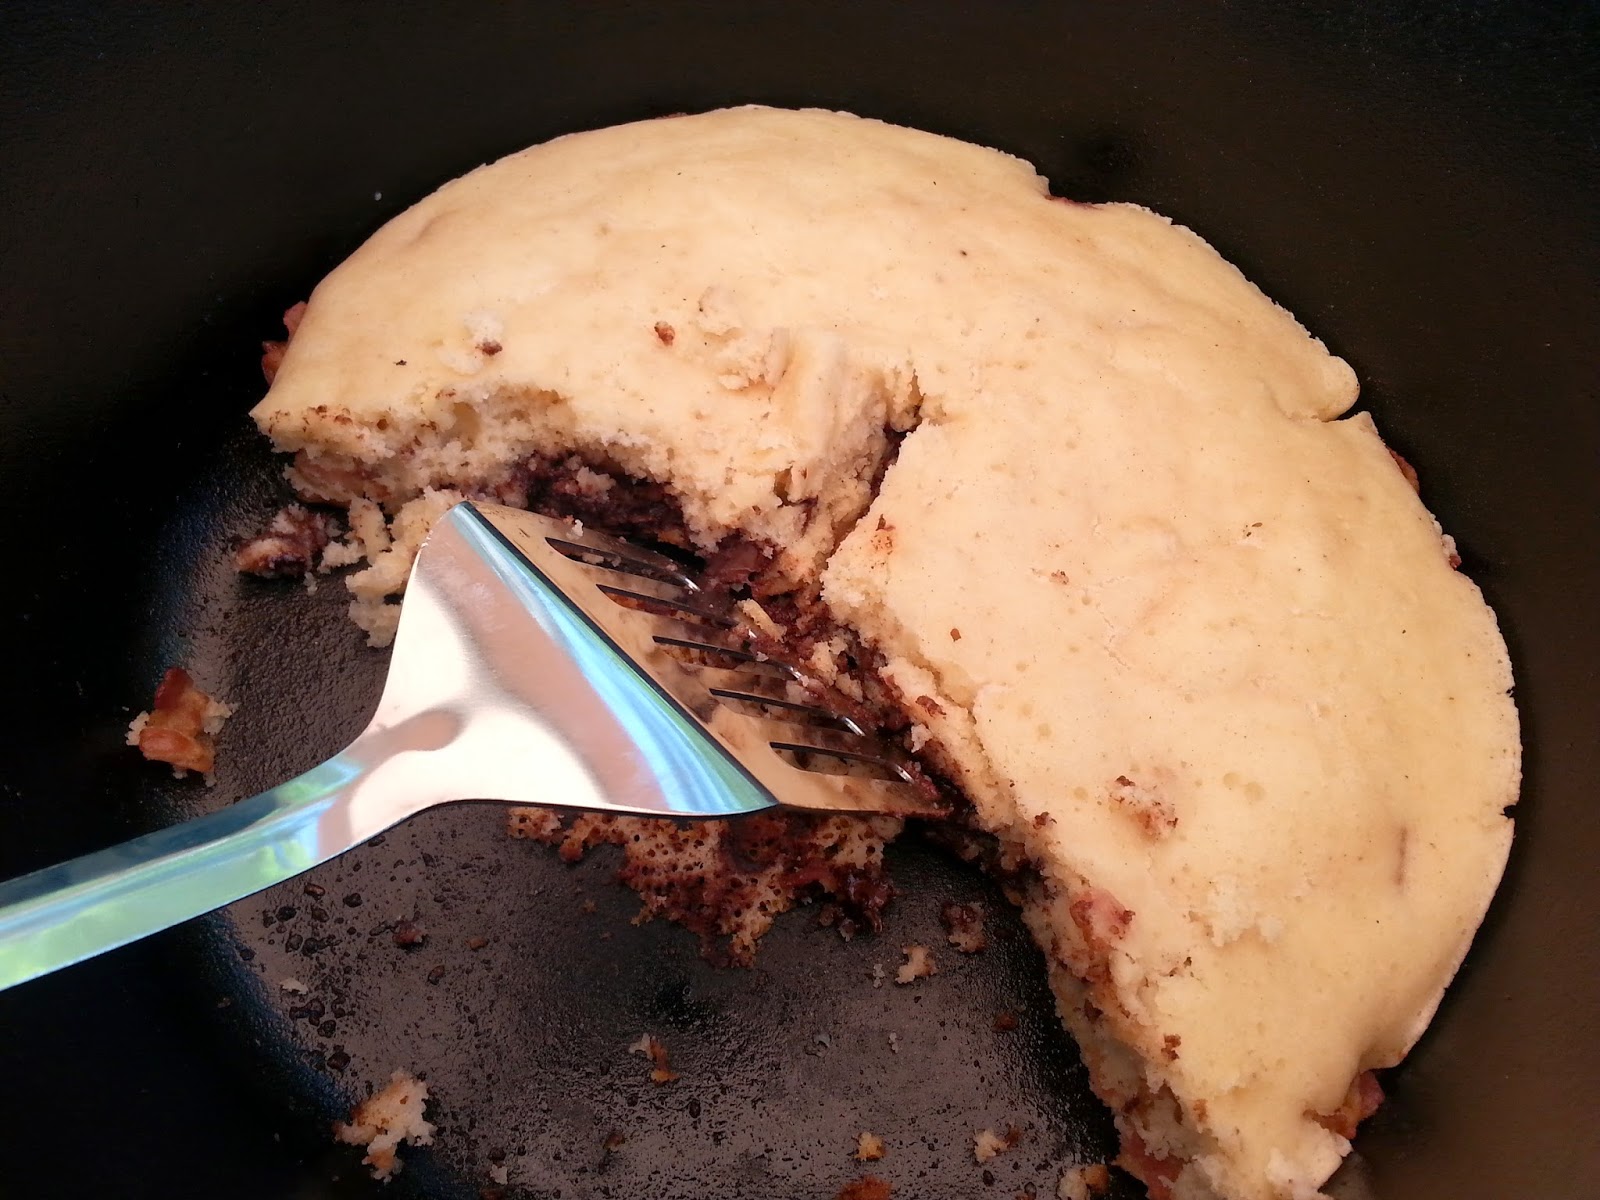
My first recipe of brilliance was to make what I call "baked pancakes".  You see.....as I mentioned in my previous post, I am taking two of Muffin's kids camping (15 & 17yo boys), and hopefully Wolf will be joining us.  Ever try cooking pancakes for four people in a frying pan that cooks ONE pancake at a time???  Yeah....not so fun when it's for four people.  So I brilliantly thought of baking the entire pancake recipe and see what I would get.  I did some research online and found that this is actually a way to cook pancakes that lots of people do!  The recipes I found were to be baked at 425 for about 10-15 minutes.  Yay!  Not a long time!!  I also found that people were saying the recipes were a little dry and adding some oil might help.

So, I had the brilliant idea to fry half a pound of bacon (chopped at home) in the dutch oven, and then try baking the pancake batter.  I use Bisquick because that's what I like.  So, I heated the dutch oven to somewhere between 425 and 450 or so.  I don't remember how many briquettes I used, but it was approx 4 per 100 degrees.  I let it preheat for about 15min or so.

Then I dumped the bacon in:

Somewhere around 20-30min later (I really have no idea as I didn't keep track) the bacon was fried!!!!
Have you EVER seen anything look so good?????

While the bacon was frying I mixed up the bisquick pancake recipe (2c bisquick, 1 egg, 1c milk).  I added 6oz of chocolate chips because Wolf and I like chocolate chip pancakes.  I then added most of the fried bacon and most of the bacon fat to the mix (who doesn't love bacon fat???).

I then poured everything into the dutch oven and covered it.  At some point I lit new briquettes and replaced the first set.  I think I baked the pancake for about 20min or so....basically until it looked done.

Here's what it looked like after we took our portions:
 

Oh My Goodness.....was it FANTASTIC!!!!!!
It might not look pretty on the plate, but it sure tasted awesome!!!


The other meal I cooked in the Dutch Oven was for dinner the same night as the day I cooked the pancake for breakfast.  This meal I had tried to cook in my Dutch Oven at Wolf's house and we ended up finishing it on the stove in the kitchen because the rice was crunchy and we were starving.

The recipe is called "Creamy Rice and Chicken" except this time I used kielbasa instead of chicken.  The ingredients are simple: three cans of cream of [something] soup (I used cream of chicken, cream of celery and cheddar cheese), a packet of onion soup mix, 1.5c of rice (I used jasmine rice), 1.5c of water and whatever meat you want.  It is supposed to bake for 1h 15min at 350 or so.  Because of my previous experience with it, I used more briquettes and I think it cooked in about an hour and a half.  I also put a piece of foil under the dutch oven and wrapped it up the sides to keep the heat of the briquettes contained, as well as making a foil 'cover' over the dutch oven lid to also keep the heat in.  I think it helped a lot with cooking times because the heat isn't being wasted.

Part way through cooking!

We got a fire started while dinner cooked!
It was yummy!!!


I'm not sure if this picture was taken while breakfast was cooking, or dinner.  It is the dutch oven along with the chimney starter and the bag of briquettes.  It might have been breakfast cooking (the bacon frying) since there are no coals on the lid of the Dutch Oven.


I can't wait to make lots more yummy stuff in it!!!


~Chelle *o*

First Camping Trip of the Year!!!!!

Wolf and I went camping last weekend - yay!  I love camping!!  I'm so excited that we got to go, even if it was a short trip (late Friday to Sunday).  We went camping in New Hampshire, at Greenfield State Park.  What a great campground!  They have a cute beach that has a walkway to the public beach and a little store.  Some of the sites are open sites (meaning you can see your neighbors pretty well) while others are more closed (you can see the neighbors but not what they are doing).  We had one of the latter sites.

Since it was a short trip, we planned to sleep in the car with an air mattress.  I found and purchased online a couple of mosquito nets to put over the front doors so that we could leave the windows open for some fresh air without getting bugs in the car (you know how I am about bugs!).  I also purchased some magnets at a local hardware store to keep the nets on the door - they worked out great! 

Here are some pictures from the weekend:

Here's the mosquito netting on one of the windows.  I'm going to take and sew each one into a sleeve (of sorts) that will slide over the door and then close the door on it.


This is the screenhouse all set up, looking at it from the car.


This is the "working" part of the screenhouse, with the containers, table, stove, lantern, etc.....


These next two are the other side of the screenhouse, with the table in it.  The cooler is under the bench to deter critters from trying to open the cool during the night.  Either it worked, or there were no critters, lol.


You can see my dutch oven on the table (in it's bag) and the Weber on the ground under the table (in the box).


I, of course, did some cooking with my awesome Dutch Oven......but that's another post!!!


I'm taking Muffin's kids camping in August, and can't wait for that trip!  They are 15 and 17 and I'm honored (and frankly a little surprised) that they still like hanging out with Auntie Chelle, lol.


~Chelle *o*

I did it!!!!!!!!!!!!

A few weeks ago (July 1st) I finally did it!  I rode my bike to work!!!!!

I had been trying to really figure it out for a few weeks, and the remaining piece of the puzzle was where to store my bike during the day.  We figured it out at work and there was no reason NOT to ride to work.

So, I decided a few weeks ago I would try it out on Tuesday July 1st.  

It was awesome!!!

A few small hiccups along the way, but nothing too major.

* Almost fell off the bike about 20min after leaving home....  went to get on the sidewalk to avoid a bridge with glass on the roadway and the sidewalk was a bit higher than the road.  I didn't see it until it was kind of too late and my tire rode along the sidewalk instead of going onto the sidewalk.  I thought for sure I was going down and was glad it was only 20min back home to clean up and then drive to work.  Miraculously I ended up on the sidewalk and upright.....I'm still not quite sure how, but I'm glad!

* Almost had a run-in with a city bus in New Bedford.  I was at a stop sign, and the bus was on the cross-street.  He had his blinker on and I thought he was pulling over to let someone off....so I started to cross the intersection.  Only he was turning and not pulling over.  Thankfully I realized what was going on soon enough and was able to stop.

Other than that, it went great.  I ate some on the bike but not really enough (more on that later), and drank a surprisingly small amount of water.  The ride was 21 miles and took me two hours (including stops).  I had intended to head out about 4:45am, but since it was partly cloudy that day, it wasn't really light enough until about 5.  I got to work by 7, showered and was at my desk for 7:30! 

I ate carbs and drank water during the day to help my muscles recover (since they had to ride home too, lol) and thought all was fine.  I headed off for home, and about an hour in I had something to eat (not nearly as much carbs as I should have).  I got to about 5 or 6 miles from home and my legs really started hurting and any sort of hill felt like torture to keep riding....even gradual ones which I've gotten pretty decent riding up.  I had no idea why it was happening but just pushed on and eventually made it home. 

I was reading something the other day about glycogen stores and how quickly they regenerate.  From previous research I know that you have enough glycogen stores for about 2hrs of activity (such as riding a bike) so I wasn't too concerned with riding to/from work since each ride is only 2hrs.  What I learned the other day is that it takes the body about 24hrs to replenish the lost glycogen.  Yeah.  Since I pretty much depleted mine on the ride to work, I didn't have much to go on riding home.  It was then that I realized the pain, etc... that I experienced close to home was what is known as "hitting the wall" or "bonking".  It is the first time that has happened to me and I hope the last time - it was NOT fun!

All that made me realize I need to eat on both the ride in to work and the ride home as if I were riding a 4hr ride and eat appropriately throughout both rides, along with carb-heavy eating at work during the day.


I'm planning to do this again this coming Wednesday, so we shall see how it goes!!

~Chelle *o*

Dutch Oven Accessories

Saw these last night at Bed Bath & Beyond, but my 20% coupon was home!  So, I reserved them today and picked them up after work!!!

What more could you need for cooking in a dutch oven?!?!

Aren't they AWESOME!!!!  They are the new utensils for my Dutch Oven!!!!  

I was going to look through my camping stuff to see if I had stainless steel tools (good chance I don't), then decided that if I'm going to cook with this even when not camping, I don't want to keep "stealing" the camping utensils and then end up not returning them and being without them on a trip.

They were $10, so with my coupon they were $8!!  Not bad for 5 pieces!!!


I'm actually planning to cook a few things this weekend with the dutch oven, so hopefully I'll remember to take pictures for you!


~Chelle  *o*

Gel Manicure....Day 4

I'm going to preface this post with this.....I meant to post this around the end of June and forgot, haha!


The should probably say Day 3...since I noticed this last night.   The end of my pinky nail was feeling......weird....like it needed to be filed.  So I was looking at it, and probably touching it more with my other fingers than I normally would.

This is what I discovered!

The gel polish is PEELING off!!!!!!!!! 

Of course, I had to investigate......it's peeled about halfway up my nail.  I don't really know why this happened.

After doing some research on applying gel polish, it is possible that I filed the edge of my nail the other day.  I believe this could have caused to polish to no longer be adhered on the end of my nail.

My, not so great, solution to this was to use a small drop of superglue to glue the polish back down!  It worked great!  No fingers stuck together and no more lifting polish!


I may call the Salon I went to on Monday to see if they have any explanation, etc... as to what could have caused it.  I also found another salon, in the same general vicinity, that is listed on OPI's website and using the Axxium Soak-Off Gel Polish (I don't think this is the same as what the place used that I went to on Monday).  According to OPI, Axxium should last 3 to 4 weeks, whereas the Salon told me the one I got should last 2 weeks.

I'll continue to update with how the nails/polish are doing over the next few weeks (or until I decide to have it re-done).

~Chelle  *o*

Update:  I managed to peel all the polish off in a few days and by the 1 week mark it was all gone.  I went and had a different salon re-do them on July 3rd.  I went camping camping last weekend and they are still doing good!!!  This past Thursday was 2 weeks. :)

Tuesday, June 24, 2014

Camp Cooking

For YEARS I have looked at and drooled over dutch ovens.  The food that comes out of them just looks soooo good!  I have even gone so far as to consider buying one.  Then I rationalize NOT buying it because they're expensive and I would only use it while camping.

Well.....I have a trip this August with Wolf and Muffin's two older boys.  We all LOVE pancakes...and bacon.  Have you tried cooking pancakes for four hungry people who love to eat?  Me either...and I wasn't relishing the idea.  I currently have a frying pan that accommodates one pancake at a time, and it would be almost two hours from start to finish.  Not my idea of a fun camp breakfast.  I could always get another frying pan, but don't really need one most of the time.

Then I somehow thought of a dutch oven.  Specifically that their covers (inverted) can be used as frying pans and would have three potential surfaces to cook pancakes on.  Yahoo!  One small problem....cost to implement the idea. 

I really want a dutch oven, but need to justify it, so I started looking online for recipe ideas and found a fabulous site!  Dutch Oven Dude!!  Not only does he have fabulous sounding recipes, he has everything you need to know about taking care of a dutch oven!  Seasoning, cleaning, storing, etc....  as well as how to regulate the temperature while baking/frying/etc....


I bought a Dutch Oven.

Big surprise, huh???


I looked online at a few sites (Amazon, REI, Lodge, LL Bean) and found the best prices on Amazon.  Plus Amazon had everything and it shipped free because I have Prime!  REI would have shipped free also, but they only had one or two of the things I bought and it was easier to order all from the same place.

So....what did I buy? 


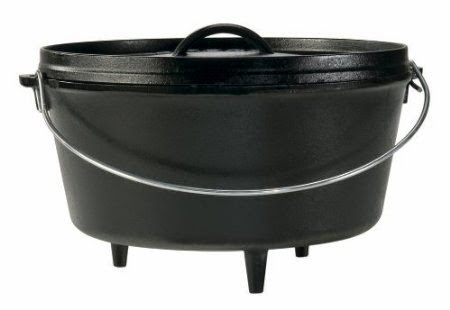
8qt Dutch Oven - 12" diameter x 5" deep


Lid Lifter - to safely remove the lid
Add caption

Lid Stand - so the lid doesn't get dirty on the ground

Safety Gloves - safe to 400 degrees!  No burnt hands!!


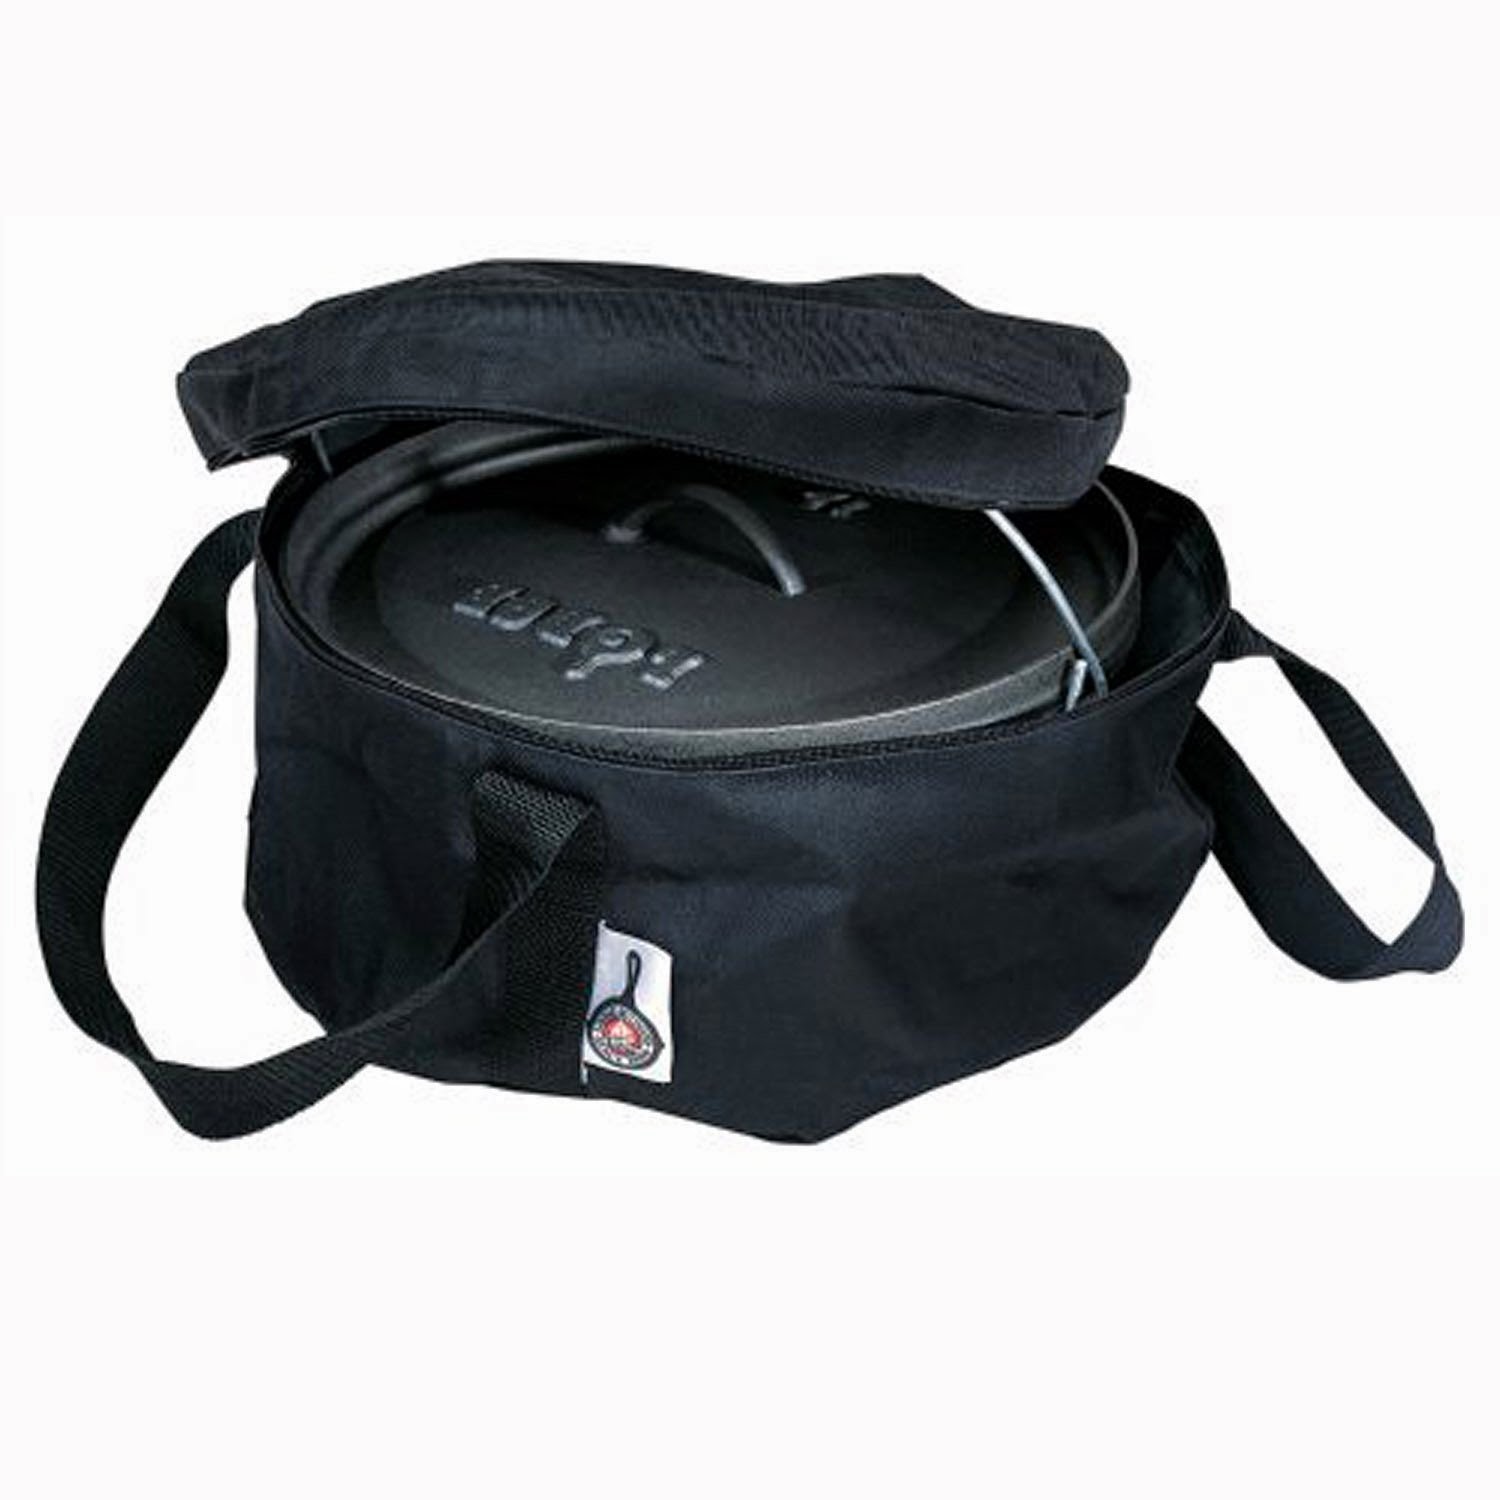
Awesome carry bag - so everything stays together!!!

It should all be delivered today!  Can't wait to open it up and see everything for myself!!


So I had to update......here is my Dutch Oven in it's carry bag!!!!!!
Those are my awesome leather gloves so I don't burn myself!!


~Chelle *o*

New Riding gear?

So, while perusing Facebook last night I came across a post from a friend of mine that does Tri-Athlon's (I think one so far...but that counts!!!) and who also happens to be a decorator too!  She posted pictures of cupcake-themed bike shorts and jersey (thinking now...they were probably tri-shorts and jersey....).  They were so adorable!!!  I immediately went to check out the website she got them from.

I might have to buy matching riding gear for my Century in September!
(does this REALLY surprise anyone that knows me?!?!?!)

The site is www.scudopro.com, and the prices are VERY reasonable!  They even have bib shorts for women at a decent price too!  All bike shorts can be ordered as shorts or bib shorts which I think is pretty cool.  I like bib shorts but have not bought any yet because they are usually $100+ and I'm not ready to pay that yet.  These are about $60 and totally affordable and justifiable for me!

I took a look around the website and found some cute ones that I like - one even matches my bike!!!

The jersey's can be ordered in short sleeve, long sleeve or sleeveless.  I think I like the sleeveless ones, since I like to wear a snug fitting short sleeve shirt underneath.  The shorts can be ordered in either regular short or bib shorts.  It seems like everything can be ordered in men's, women's or youth; and sizes from XS to 4XL!  There's a sizing chart so you can figure out which size to order too.

Here is the cupcake one that my friend owns:
Isn't it awesome!!!!!


Here's the one that I found that matches my bike!  I just might need this one for my Century!
You can see the regular shorts vs the bib shorts...bib shorts don't slide down!


I also came across some "Keep Calm" varieties.  I love all the "Keep Calm" stuff that you see around and these are pretty cool.  I might have to get one of these also.  They come in a ton of colors, and you can get matching shorts in the same solid color also!

The different Keep Calm jersey's that I like (with matching shorts):


Here are all the different colors the jersey's and shorts can be ordered in:

Aren't the colors awesome!  I might have to get one of the blue shades, even though the purple matches my bike - I LOVE blue!!!!!!  Or red - Mickey Mouse!!!


Before I buy any of this, I need to have the money to pay the rest of my Disney trip, haha!

~Chelle *o*


Gel Polish Manicures

I have a love/hate relationship with my finger nails.  I've had it since childhood....I love long finger nails, but I love to bite them too.  See the problem?? 

On and off in my life I've attempted to let my nails grow and have been successful at times.  I am most successful if they are painted.  For some strange reason, when I see the white of the nails I am compelled to bite them. 

I have gone to places for manicures and I've also done my own. 
  • Doing my own can be time consuming....about a half hour or so to actually paint them, but then I can't really do much the rest of the night because I end up messing them up.  They do end up lasting a week or more when I paint them though, and I've gotten better at not covering my fingers with polish
  • Going to a salon is quicker, but I still seem to mess them up.  Plus, I have an issue with salons that use UV for regular polish as I think this is totally unnecessary and leads to "old" looking hands on people that get manicures regularly.  I have managed to find a place near work that uses fans for regular polish manicures though so that makes me happy.

As you're aware, I'm going to Disney in September.  I'd like to have my nails done and have them last the whole trip.  I'd even like some Disney Art put on them.  I looked into Disney Nail Art online and found some cute ideas that I figure I could do with the right tools (which I bought of course).  Well...in my research to find how to get a manicure to last two weeks (I'll be gone for 10 days) I ran across Gel polish. 

From my research, gel polish can last anywhere from 2/3 weeks to 4 weeks+.  The polish is cured with UV light (more on that later), and has to be removed by soaking in acetone-based polish remover.  Most cheaper nail salon's (you know the ones I'm talking about) use a grinder to get the old polish off rather than soaking it off.  This is SO bad for your nails!!  Not only do they grind the polish off but they grind off some of your own nail too!  This not only hurts but can be dangerous and will ruin your nails and nailbed. 

I decided to try out the gel manicure before getting it done for Disney to see how long it would really last.  Also to find a place I liked and seemed good.  So, I looked around my area for a salon that wasn't one of the cheaper ones around and found a day spa not too far from work.  I called to inquire how much a gel manicure cost ($30) and made an appointment for yesterday after work. 

I somehow managed to let my nails grow without polish on them.  Here they are before the manicure:


I wasn't sure what to expect with the gel manicure, as I've always had regular ones.  She didn't really do much to my cuticles, but I trimmed them the other day so there probably wasn't much for her to do.  She didn't soak my fingers like the other places do.....I don't know if that's because of the gel polish or not.  She also did the lotion massage after the manicure instead of before.  She didn't have my wash my hands beforehand, but she did put some stuff on the nails before putting the base coat.....maybe that was to clean them?   I really should have asked more questions, but didn't think of it then.

I love the color I picked out and she did a good job putting it on!  There are five total layers in the gel manicure: base coat, three coats of color and a top coat.  Each one was under the UV light for a minute to cure it before putting the next layer on.  I don't know how often I'll end up getting a gel manicure done, but for now I'm not too worried about the UV light as I'm not getting this done every week.  If I end up getting this done regularly, I will probably put sunscreen on my hands beforehand.

Here's what they look like now:

The nail surface is smooth and shiny!  The picture makes it look like there are imperfections but that's just the light reflecting off of them.


I was talking to the lady and asked how they remove the polish to do a new one and she said they buff the surface lightly by hand, then soak in acetone-based remover (right answer!!!).  I will definitely go back to them again.  I also asked her if they nail art and what they charged for it.  She asked what I was looking for, so I told her I was going to Disney and was looking to get some simple Mickey heads (the three dot kind) and dots and such and she said there's no extra charge for simple nail art!  Yah!  I will probably try my hand at it next week, but good to know they can do it also.

So, we'll see how the manicure goes.....my plan is to take a picture every week and see how it's doing.

~Chelle *o*

A few new cakes

In case you were wondering...I have not abandoned cakes yet, lol.  I just haven't been as busy with them as I once was.  You know what.....that's ok!  I have not much going on in my life right now, that I'm not sure I could handle a lot of cakes/shows like I was doing a few years ago.

I recently did a birthday cake for Muffin's oldest son (17!!  How did that happen?!?!?!?!).  Since his brother is on a Gluten Free Casein Free diet (and is allergic to soy), the goodies that I make to bring to the house need to be free of gluten, casein (dairy) and soy.  The following cake (and icing) meets all of those requirements!  The cake was very tasty and everyone loved it!


The icing is a new recipe that I haven't tried before.  It was ok, but ended up a little grainy....I may have overbeat the shortening (Spectrum brand).  The chocolate started out as a chocolate ganache made with Enjoy Life chocolate chips and coconut milk (canned).  The proportions were off a bit because the ganache never really thickened up to a whippable consistency.  I ended up added powdered sugar and beating the life out of it to get something pipe-able.  Then it stiffened up....figures, right?  Oh well, it was delicious anyway!


The second cake was for a co-worker's birthday.  The cake is gluten free (she has Celiac), but the icing is my regular cream cheese icing.  It was a little too soft....it started to slide down the side of the cake in a couple of spots.  Oh well...it tasted good too!


~Chelle *o*


Pressed Pennies like you've never seen them!

Every one has heard of pressed pennies (at least I hope you have!).....but I bet you've never see this!  I saw this a few weeks ago (I don't remember where....Facebook maybe?), but there's a lady that has turned her pressed pennies into jewelry!!  I know!!!  She actually has two websites...both of which I've heard of and one that I've been on many times.

Most of you have probably heard of Cake Wrecks (www.cakewrecks.com)...I LOVE that site!  Jen (the lady that blogs) is hilarious and always makes me laugh.  Well...she has another (lesser known to me) website called Epbot.  Imagine my surprise when I clicked the Facebook link and it brought me to her site!  I knew then and there that the ideas/items she came up with would be fabulous!  She did not dissappoint!  Here's a link to the Epbot post that I read a few weeks ago:  http://www.epbot.com/2010/07/simply-smashing-penny-jewelry.html.

Now...like any good Disney fan, I have some pressed pennies of my own  (8 pennies and 1 pressed quarter).  Yeah yeah....I've been 5 times and should have more.....planning to remedy that in September!  I also have two pennies from Stonehenge when I went 10 years ago (HOLY COW....how has it been 10 years since my Europe trip!!!).  Anyway....back to the discussion at hand.  I liked a lot of the ideas on the Epbot blog, but still wasn't sure what I wanted to make out of mine.

Coincidentally enough...JEM has gotten into jewelry making (how fabulous is that?!?), so I did what any bestest friend would do....I immediately emailed JEM with the website link and enlisted her help in coming up with ideas.  In a few hours she had some ideas but wanted to think some more about them....I still don't know what those ideas are, but in fairness I haven't asked either, haha!

I'm hoping to go visit JEM in January sometime, and am planning on bringing my pennies with me so we can make jewelry!  Or more likely....she will make the jewelry and I'll keep her company!

Here are the Pennies that I have:

Mickey:


Assorted Disney:


Stonehenge:


JEM and I are working on a design for one of the pennies for a good friend of ours (can't mention it...she might read this).  Can't wait to tell you all about it when I give it to her!

~Chelle *o*

Monday, May 5, 2014

Disney "Home" away from Home

I thought I'd show everyone where we're staying for our trip in September!  I'm so excited!!!

We are staying at Port Orleans Riverside (POR) and there is so much at the resort it's incredible!  There are nightly movies on the grass, the main pool is on an island in the middle of the resort, there's a boat that you can take to Downtown Disney (and a bus, the boat is cool), you can rent Surrey bikes by the half hour to ride around the resort, there are Carriage Rides around the resort, I'm sure I'm leaving stuff out because there's just so much!

They rent 2 and 4 person Surrey bikes.  Here's what the 2-person Surrey bike looks like:
Isn't it so cute!!!!  I can't wait for Wolf and I to ride it!

Here's the map of our resort!  It looks pretty big, but it's not as overwhelming as it might seem!


I can't wait!!!  Only 147 days!

~Chelle  *o*

Biking Attire

I was talking with some co-workers about what I wear when biking and found some pictures of my sneakers (recent) and of me all decked out (almost two years old) in my riding gear.  So, I thought I'd share them with you!

I absolutely LOVE my sneakers!  So much that I bought two pairs!  They are Clima-Cool sneakers from Adidas.  They are great!  A problem I had when I first started riding was my feet getting too hot in the summer while riding.  I did some research and found that these allow the air to flow through the sneakers, keeping my feet from overheating!  I love the crazy colors :)


Here is me from 2012 while riding the Cape Cod Rail Trail.  This was in Chatham, approx. 10-15m of riding by this point.  I have new, better fitting gloves (that also match my bike!), and a new phone, but the rest is the same.  I didn't realize until I looked at this picture that my tank top matched my helmet, lol!


~Chelle  *o*

Thursday, May 1, 2014

Free Dining.....Yay or Nay....and a startling revelation!

So, for the past few weeks, rumors have been buzzing over on the Disney message board I lurk on.  Like most, I've been anticipating the announcement of the Free Dining dates for the Fall.  About a week ago the suspected dates were posted and I was excited that my trip fell within the correct time frame.  All that was left was to wait to see when it would be announced, and if any resorts would be excluded.  Some are always excluded, and it's usually the same ones each time.  For instance, Port Orleans French Quarter is always excluded, while Port Orleans Riverside isn't usually excluded.

Well...it was announced today semi-officially what the check-in dates and the excluded resorts are.  Port Orleans Riverside is excluded from the Free Dining promotion.  Now I had a decision to make....change resorts to get the Free Dining promotion, or stay where I am and pay for the Dining Plan.  So I took a look at the other Moderate resorts that Disney has (I wanted something a little nicer than a Value for Wolf's and I's trip).  The other two are Carribean Beach Resort and Coranado Springs Resort.  I looked at the maps for both and they are HUGE!!  I looked at the ameneties and offerings at each resort also.  I came to a startling conclusion...........

I'd rather stay at Port Orleans Riverside and pay for the Dining Plan than change resorts and stay somewhere I'm not very happy with just to get the Dining Plan for free.  If you're wondering....the Dining Plan is costing me $950 for the both of us for the trip.  $950.  And I'm choosing to pay it because I love the resort too much to stay somewhere else.  I must be crazy, lol.  There's just so much cool stuff at Port Orleans Riverside and I'd miss not having it at our resort.

~Chelle *o*

Epcot Food & Wine Festival

Every year, in the fall, Epcot hosts the International Food & Wine Festival.  A whole bunch of food/drink kiosks are set up around Epcot's World Showcase.  These kiosks are all from different countries, and not necessarily those found in the World Showcase.  I have never been to Disney during this event, but Wolf and I will be there this September and I'm so excited!!!  Our plan is to snack our way through lunch that day!
How fun does this look?!?!?!?!

I did some looking online and was able to find the menus from the kiosks/countries that were there last year (2013).  The items/countries may change for 2014 but this will give you (and me!) an idea of all the great offerings!  The Festival starts September 19th, so I would think that the menus will be out about then, then the real planning of what to eat can begin!!! 

Here's the link to where I got the pictures, in case you can't read the food items!


Poland had to be different :P