Tuesday, June 24, 2014

Camp Cooking

For YEARS I have looked at and drooled over dutch ovens.  The food that comes out of them just looks soooo good!  I have even gone so far as to consider buying one.  Then I rationalize NOT buying it because they're expensive and I would only use it while camping.

Well.....I have a trip this August with Wolf and Muffin's two older boys.  We all LOVE pancakes...and bacon.  Have you tried cooking pancakes for four hungry people who love to eat?  Me either...and I wasn't relishing the idea.  I currently have a frying pan that accommodates one pancake at a time, and it would be almost two hours from start to finish.  Not my idea of a fun camp breakfast.  I could always get another frying pan, but don't really need one most of the time.

Then I somehow thought of a dutch oven.  Specifically that their covers (inverted) can be used as frying pans and would have three potential surfaces to cook pancakes on.  Yahoo!  One small problem....cost to implement the idea. 

I really want a dutch oven, but need to justify it, so I started looking online for recipe ideas and found a fabulous site!  Dutch Oven Dude!!  Not only does he have fabulous sounding recipes, he has everything you need to know about taking care of a dutch oven!  Seasoning, cleaning, storing, etc....  as well as how to regulate the temperature while baking/frying/etc....


I bought a Dutch Oven.

Big surprise, huh???


I looked online at a few sites (Amazon, REI, Lodge, LL Bean) and found the best prices on Amazon.  Plus Amazon had everything and it shipped free because I have Prime!  REI would have shipped free also, but they only had one or two of the things I bought and it was easier to order all from the same place.

So....what did I buy? 


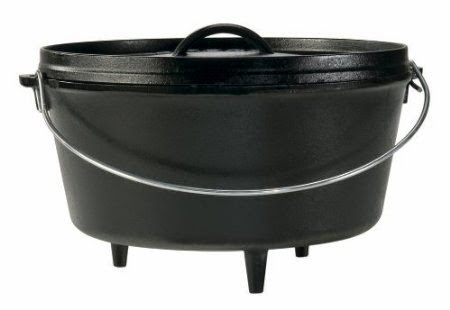
8qt Dutch Oven - 12" diameter x 5" deep


Lid Lifter - to safely remove the lid
Add caption

Lid Stand - so the lid doesn't get dirty on the ground

Safety Gloves - safe to 400 degrees!  No burnt hands!!


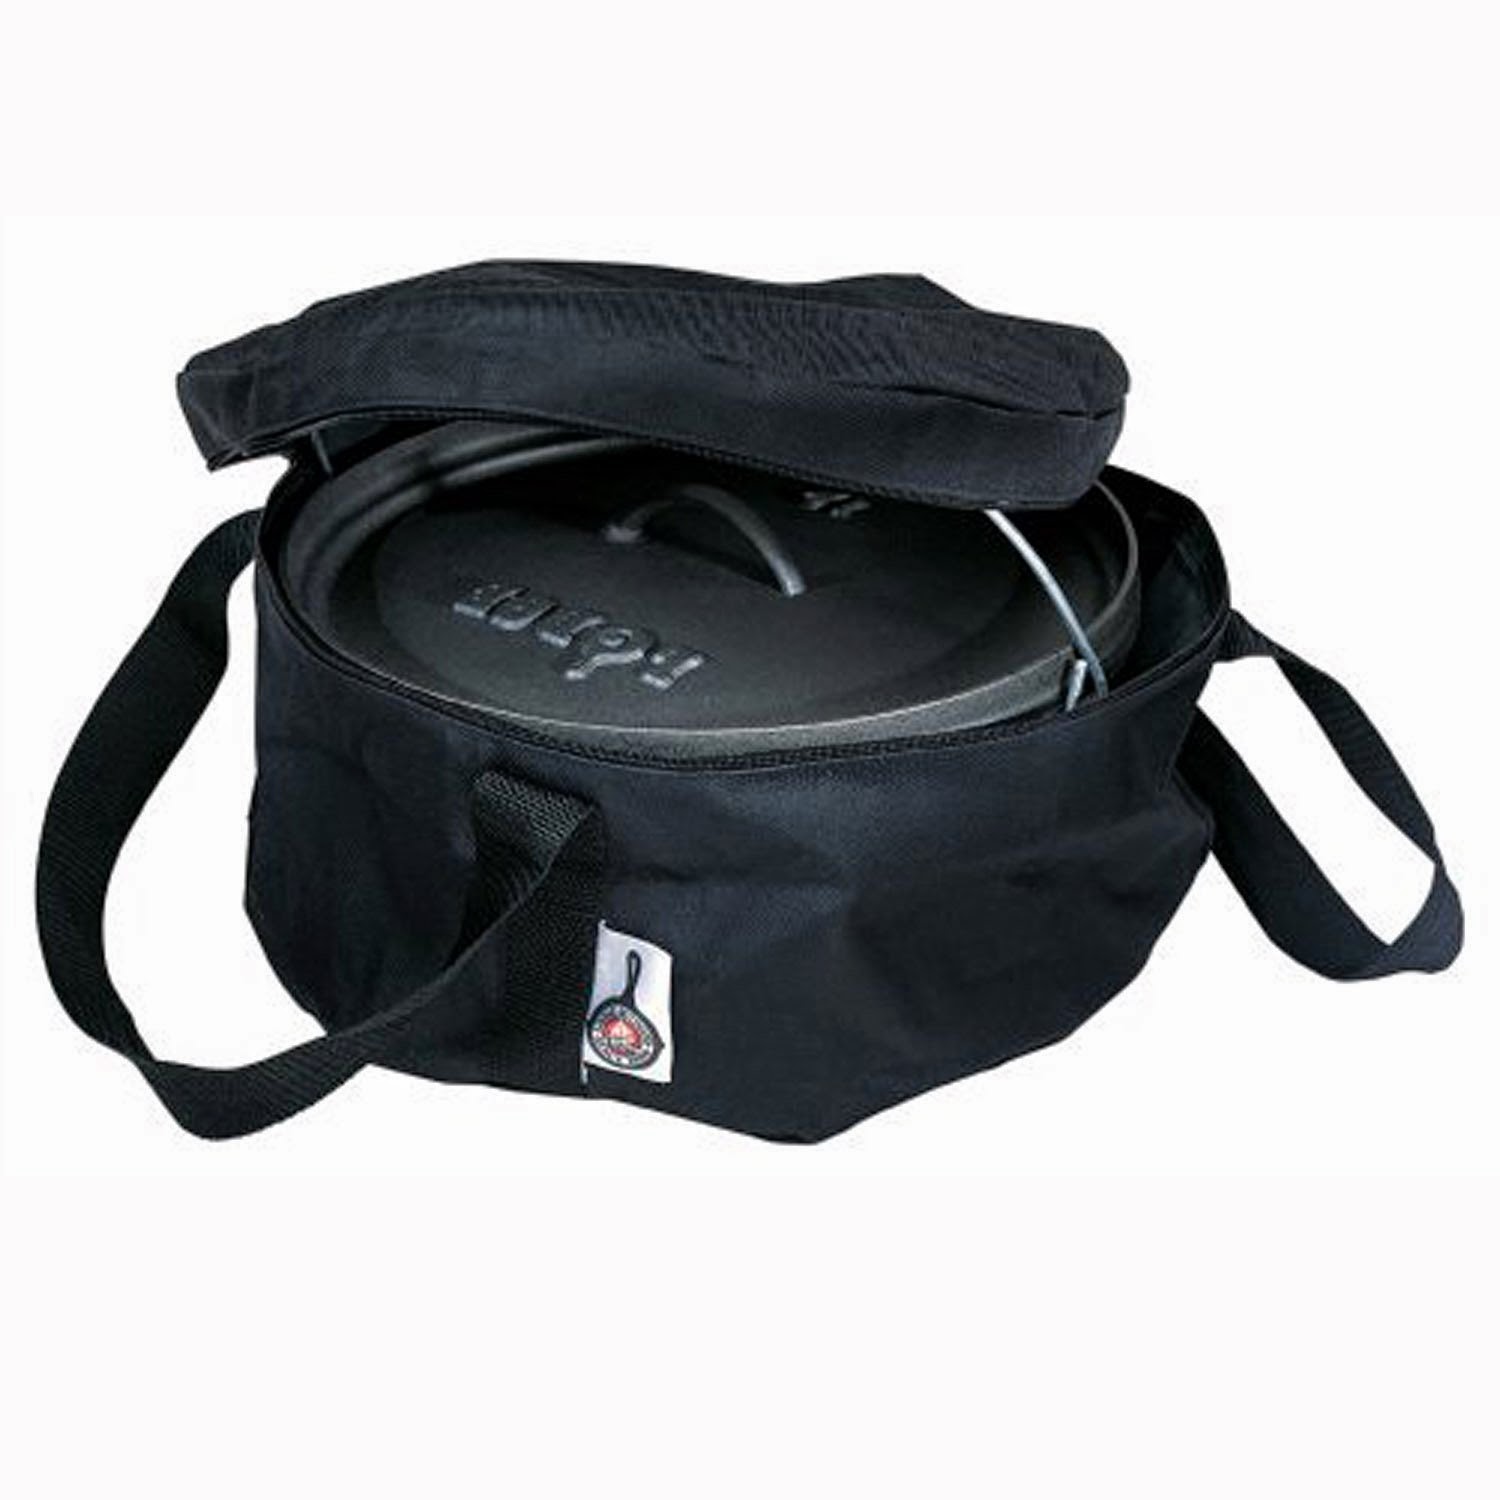
Awesome carry bag - so everything stays together!!!

It should all be delivered today!  Can't wait to open it up and see everything for myself!!


So I had to update......here is my Dutch Oven in it's carry bag!!!!!!
Those are my awesome leather gloves so I don't burn myself!!


~Chelle *o*

New Riding gear?

So, while perusing Facebook last night I came across a post from a friend of mine that does Tri-Athlon's (I think one so far...but that counts!!!) and who also happens to be a decorator too!  She posted pictures of cupcake-themed bike shorts and jersey (thinking now...they were probably tri-shorts and jersey....).  They were so adorable!!!  I immediately went to check out the website she got them from.

I might have to buy matching riding gear for my Century in September!
(does this REALLY surprise anyone that knows me?!?!?!)

The site is www.scudopro.com, and the prices are VERY reasonable!  They even have bib shorts for women at a decent price too!  All bike shorts can be ordered as shorts or bib shorts which I think is pretty cool.  I like bib shorts but have not bought any yet because they are usually $100+ and I'm not ready to pay that yet.  These are about $60 and totally affordable and justifiable for me!

I took a look around the website and found some cute ones that I like - one even matches my bike!!!

The jersey's can be ordered in short sleeve, long sleeve or sleeveless.  I think I like the sleeveless ones, since I like to wear a snug fitting short sleeve shirt underneath.  The shorts can be ordered in either regular short or bib shorts.  It seems like everything can be ordered in men's, women's or youth; and sizes from XS to 4XL!  There's a sizing chart so you can figure out which size to order too.

Here is the cupcake one that my friend owns:
Isn't it awesome!!!!!


Here's the one that I found that matches my bike!  I just might need this one for my Century!
You can see the regular shorts vs the bib shorts...bib shorts don't slide down!


I also came across some "Keep Calm" varieties.  I love all the "Keep Calm" stuff that you see around and these are pretty cool.  I might have to get one of these also.  They come in a ton of colors, and you can get matching shorts in the same solid color also!

The different Keep Calm jersey's that I like (with matching shorts):


Here are all the different colors the jersey's and shorts can be ordered in:

Aren't the colors awesome!  I might have to get one of the blue shades, even though the purple matches my bike - I LOVE blue!!!!!!  Or red - Mickey Mouse!!!


Before I buy any of this, I need to have the money to pay the rest of my Disney trip, haha!

~Chelle *o*


Gel Polish Manicures

I have a love/hate relationship with my finger nails.  I've had it since childhood....I love long finger nails, but I love to bite them too.  See the problem?? 

On and off in my life I've attempted to let my nails grow and have been successful at times.  I am most successful if they are painted.  For some strange reason, when I see the white of the nails I am compelled to bite them. 

I have gone to places for manicures and I've also done my own. 
  • Doing my own can be time consuming....about a half hour or so to actually paint them, but then I can't really do much the rest of the night because I end up messing them up.  They do end up lasting a week or more when I paint them though, and I've gotten better at not covering my fingers with polish
  • Going to a salon is quicker, but I still seem to mess them up.  Plus, I have an issue with salons that use UV for regular polish as I think this is totally unnecessary and leads to "old" looking hands on people that get manicures regularly.  I have managed to find a place near work that uses fans for regular polish manicures though so that makes me happy.

As you're aware, I'm going to Disney in September.  I'd like to have my nails done and have them last the whole trip.  I'd even like some Disney Art put on them.  I looked into Disney Nail Art online and found some cute ideas that I figure I could do with the right tools (which I bought of course).  Well...in my research to find how to get a manicure to last two weeks (I'll be gone for 10 days) I ran across Gel polish. 

From my research, gel polish can last anywhere from 2/3 weeks to 4 weeks+.  The polish is cured with UV light (more on that later), and has to be removed by soaking in acetone-based polish remover.  Most cheaper nail salon's (you know the ones I'm talking about) use a grinder to get the old polish off rather than soaking it off.  This is SO bad for your nails!!  Not only do they grind the polish off but they grind off some of your own nail too!  This not only hurts but can be dangerous and will ruin your nails and nailbed. 

I decided to try out the gel manicure before getting it done for Disney to see how long it would really last.  Also to find a place I liked and seemed good.  So, I looked around my area for a salon that wasn't one of the cheaper ones around and found a day spa not too far from work.  I called to inquire how much a gel manicure cost ($30) and made an appointment for yesterday after work. 

I somehow managed to let my nails grow without polish on them.  Here they are before the manicure:


I wasn't sure what to expect with the gel manicure, as I've always had regular ones.  She didn't really do much to my cuticles, but I trimmed them the other day so there probably wasn't much for her to do.  She didn't soak my fingers like the other places do.....I don't know if that's because of the gel polish or not.  She also did the lotion massage after the manicure instead of before.  She didn't have my wash my hands beforehand, but she did put some stuff on the nails before putting the base coat.....maybe that was to clean them?   I really should have asked more questions, but didn't think of it then.

I love the color I picked out and she did a good job putting it on!  There are five total layers in the gel manicure: base coat, three coats of color and a top coat.  Each one was under the UV light for a minute to cure it before putting the next layer on.  I don't know how often I'll end up getting a gel manicure done, but for now I'm not too worried about the UV light as I'm not getting this done every week.  If I end up getting this done regularly, I will probably put sunscreen on my hands beforehand.

Here's what they look like now:

The nail surface is smooth and shiny!  The picture makes it look like there are imperfections but that's just the light reflecting off of them.


I was talking to the lady and asked how they remove the polish to do a new one and she said they buff the surface lightly by hand, then soak in acetone-based remover (right answer!!!).  I will definitely go back to them again.  I also asked her if they nail art and what they charged for it.  She asked what I was looking for, so I told her I was going to Disney and was looking to get some simple Mickey heads (the three dot kind) and dots and such and she said there's no extra charge for simple nail art!  Yah!  I will probably try my hand at it next week, but good to know they can do it also.

So, we'll see how the manicure goes.....my plan is to take a picture every week and see how it's doing.

~Chelle *o*
A few new cakes

In case you were wondering...I have not abandoned cakes yet, lol.  I just haven't been as busy with them as I once was.  You know what.....that's ok!  I have not much going on in my life right now, that I'm not sure I could handle a lot of cakes/shows like I was doing a few years ago.

I recently did a birthday cake for Muffin's oldest son (17!!  How did that happen?!?!?!?!).  Since his brother is on a Gluten Free Casein Free diet (and is allergic to soy), the goodies that I make to bring to the house need to be free of gluten, casein (dairy) and soy.  The following cake (and icing) meets all of those requirements!  The cake was very tasty and everyone loved it!


The icing is a new recipe that I haven't tried before.  It was ok, but ended up a little grainy....I may have overbeat the shortening (Spectrum brand).  The chocolate started out as a chocolate ganache made with Enjoy Life chocolate chips and coconut milk (canned).  The proportions were off a bit because the ganache never really thickened up to a whippable consistency.  I ended up added powdered sugar and beating the life out of it to get something pipe-able.  Then it stiffened up....figures, right?  Oh well, it was delicious anyway!


The second cake was for a co-worker's birthday.  The cake is gluten free (she has Celiac), but the icing is my regular cream cheese icing.  It was a little too soft....it started to slide down the side of the cake in a couple of spots.  Oh well...it tasted good too!


~Chelle *o*


Pressed Pennies like you've never seen them!

Every one has heard of pressed pennies (at least I hope you have!).....but I bet you've never see this!  I saw this a few weeks ago (I don't remember where....Facebook maybe?), but there's a lady that has turned her pressed pennies into jewelry!!  I know!!!  She actually has two websites...both of which I've heard of and one that I've been on many times.

Most of you have probably heard of Cake Wrecks (www.cakewrecks.com)...I LOVE that site!  Jen (the lady that blogs) is hilarious and always makes me laugh.  Well...she has another (lesser known to me) website called Epbot.  Imagine my surprise when I clicked the Facebook link and it brought me to her site!  I knew then and there that the ideas/items she came up with would be fabulous!  She did not dissappoint!  Here's a link to the Epbot post that I read a few weeks ago:  http://www.epbot.com/2010/07/simply-smashing-penny-jewelry.html.

Now...like any good Disney fan, I have some pressed pennies of my own  (8 pennies and 1 pressed quarter).  Yeah yeah....I've been 5 times and should have more.....planning to remedy that in September!  I also have two pennies from Stonehenge when I went 10 years ago (HOLY COW....how has it been 10 years since my Europe trip!!!).  Anyway....back to the discussion at hand.  I liked a lot of the ideas on the Epbot blog, but still wasn't sure what I wanted to make out of mine.

Coincidentally enough...JEM has gotten into jewelry making (how fabulous is that?!?), so I did what any bestest friend would do....I immediately emailed JEM with the website link and enlisted her help in coming up with ideas.  In a few hours she had some ideas but wanted to think some more about them....I still don't know what those ideas are, but in fairness I haven't asked either, haha!

I'm hoping to go visit JEM in January sometime, and am planning on bringing my pennies with me so we can make jewelry!  Or more likely....she will make the jewelry and I'll keep her company!

Here are the Pennies that I have:

Mickey:


Assorted Disney:


Stonehenge:


JEM and I are working on a design for one of the pennies for a good friend of ours (can't mention it...she might read this).  Can't wait to tell you all about it when I give it to her!

~Chelle *o*